
Adding a water feature to your garden can bring charm and life to your outdoor area. 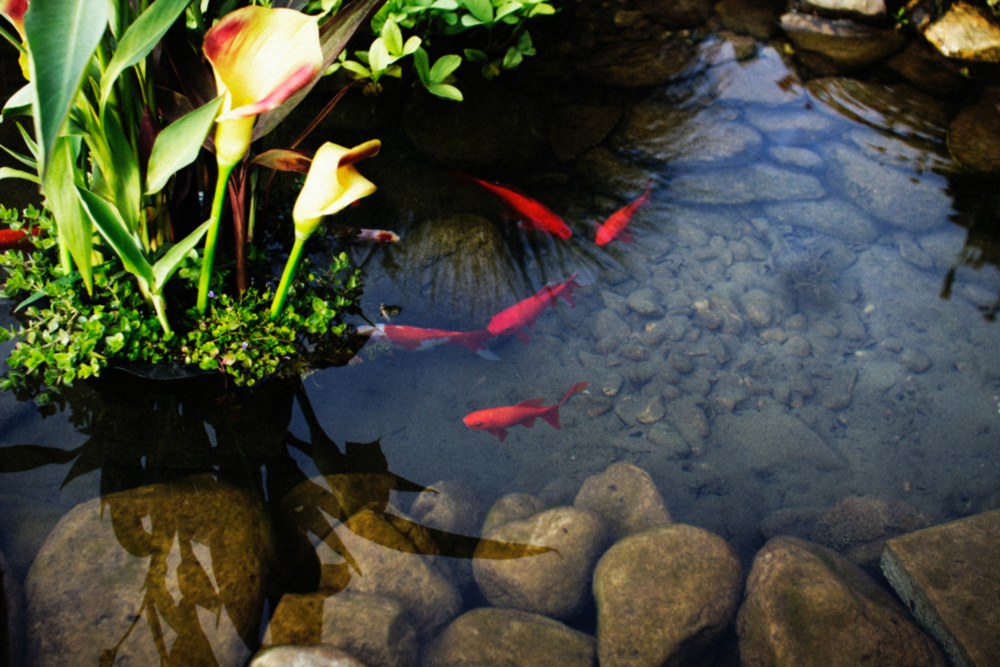 Aside from the dulcet tones of frogs congregating in your back garden as a mist of low-flying mosquitoes descends upon the stagnant water, fish ponds can add an array of interesting aromas to your back garden.
All joking aside, well-maintained fish ponds can be made into truly spectacular features. There is a fantastic range of flora and fauna available to bring your pond to life. There is also a great selection of materials you can use to add different natural effects and adding subtle lighting can give spectacular results.
If you've been looking out over your back garden, dreaming about adding a fish pond… why not get started today? PSM´s simple and straightforward guide will tell you everything you need to know.
Planning your fishpond
Before you start digging up your garden, check with your local Council as regards regulations for your area. Some Councils may require planning permission for a fish pond and there may be regulations regarding the distance to be maintained from your neighbour's property or your own house.
A fish pond will add humidity, so you probably don't want one too close to your home’s foundations.
You will also need to be sure that you’re not digging too close to septic tanks or any underground pipework.
Remember that your fish pond will need a pump to keep water circulating, this means you will need access to a waterproof power supply nearby.
Ideally, your fish pond should be exposed to equal parts of sunlight and shade, preferably getting the sun in the morning. Do not place the pond directly under any trees as falling leaves and flowers will clutter the water.
After planning your fish pond, mark out the shape of your pond with spray paint, remembering to mark out any shelves or level changes. It should have a shallow end with steps down to a deeper end. This is the most favourable configuration for wildlife to flourish.
Digging your Fish Pond
To make light work of the digging part, your best bet is to hire a mini digger. PSM hire stock an ample range of mini diggers including narrow micro diggers which can easily fit through garden gates, so as to access back gardens.
Remember that there will be a large amount of soil to be repurposed or disposed of. It is advisable to hire a skip loading dumper to tip soil into so that it can easily be transported to a skip for disposal or another part of your garden for repurposing.
Position the digger on sturdy ground and in a position to start digging in the centre of the pond. Dig in a straight line from one end of the pond to the other.
If possible get someone to assist in checking that the digging depth is correct.
Dig with patience, looking not to overfill the bucket. An overflowing bucket will result in soil being spilt which adds work and time to your project.
When the digger has dug across the pond, bring the machine back to the end you started at. Dig at a slight angle to the body of the machine, this will widen the trench. Dig and move the machine along, heading back to the beginning after you reach the end. Repeat until the pond has been completely dug out.
When you finish digging your fish pond, check that your pond and the shelves are level before proceeding to the next part.
Finishing the pond
Check the pit for rocks or any other sharp materials which may pierce your pond liner. 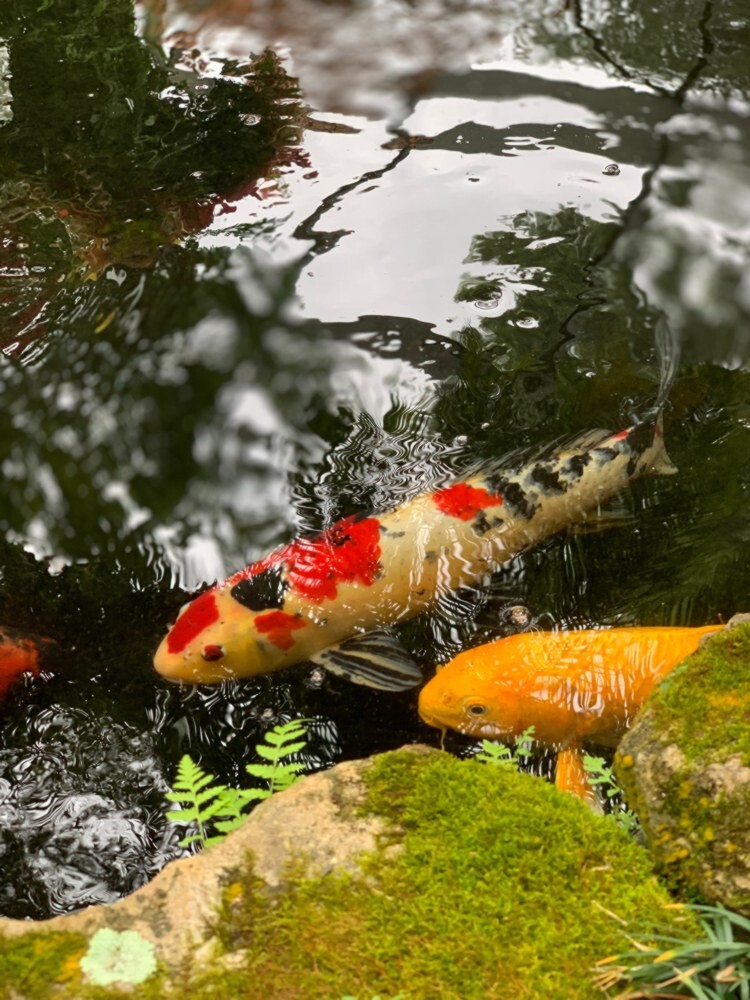
If your pit has gathered water, you will need to empty this before proceeding to line your pond.
You may choose to directly lay pond liner over the pit, although some people would recommend you use an underlay first.
Drape the pond liner over the pit. The most effective way to get it to fit snugly is to take your shoes off, get into the pit and “tread it” into place. Make sure that there is plenty of liner overlapping at the top edges of the pond as this will avoid water seeping between the liner and the pit.
Hold the pond liner in place with rocks or bricks, then partially fill the pond. This will allow you to straighten out any creases in the liner as it takes the shape of the pond. If there is a lot of excess liner you may choose to cut some away. Alternatively, you may choose to bury it or hide it under rocks or bricks. Use bricks, rocks or paving slabs to hide as much of the liner as possible and to hold it in place. You will need to add a water pump to keep the water circulating. This is the stage at which to do it, especially if you need to cement it in place between rocks or paving slabs.
Add vegetation
Choose the plants you intend on adding, making sure you have enough of the right kind of vegetation for your fish to hide in as this will protect them from predators.
Plant your aquatic plants in clusters and allow the vegetation to settle for at least a day before adding fish.
Add fish
Do your research before you add fish to your pond. Be sure to choose species that are adapted to your local climate, that are the right size for your pond and that won´t eat each other.
If you have followed our instructions, congratulations! You are now the proud owner of your very own fish pond. If you enjoyed digging a fish pond and would like to try your hand at other DIY challenges, PSM stocks a vast range of construction and gardening tools to make light work of all your projects. Call us today on 02088505658, our friendly team is always happy to help.
ing high-quality tools and equipment and on providing unparalleled customer service. We provide a huge range of construction equipment and tools for hire in Blackfen, Kent and surrounding areas. If you are looking for hydraulic breaker hire, call us on 02088505658, our friendly team are always happy to help.